Sunday, November 30, 2014

French Kiss: Grilled Turkey, Cranberry and Brie Sandwiches

The Thanksgiving holiday isn't quite over, so treat yourself to a hearty lunch with leftovers from the feast! We've all seen variations of this tasty sandwich at our favorite cafes and eateries, but it's always fun to try and replicate things at home. The French flavors found here are not only the brie, but the Dijon mustard and brioche bread:

Grilled Turkey, Cranberry and Brie Sandwiches


Grilled Turkey, Cranberry and Brie Sandwiches

For each sandwich:
2 half-inch slices brioche, challah, or any good egg bread
2-3 slices roast turkey
Sliced brie cheese
Cranberry sauce
Dijon mustard
Softened butter

Assemble your sandwich by spreading some cranberry sauce on the inside of one slice of bread and some Dijon mustard on the other. Layer on the turkey and brie and close the sandwich. Heat a non-stick skillet or grill pan over medium heat; butter the top of the sandwich. Place top-side down in the skillet and grill until golden. Butter the side facing you and flip to grill on the other side. Remove, cut in half, and enjoy!

>o<

Friday, November 28, 2014

A Great Pair of Chinos: Cappuccino/Mochaccino Snack Cakes

It's Black Friday, and whether you brave the crowds or do your purchasing online, here are a few caffeine-inspired treats to keep you adequately fueled for holiday shopping!

snack cake cupcakes cappuccino mochaccino
Why choose? Make both!


Cappuccino Snack Cakes

Dry Ingredients:
1 1/2 cups all-purpose flour
1/2 teaspoon baking powder
1/2 teaspoon baking soda
1/2 teaspoon kosher salt
1/4 teaspoon ground cinnamon

Wet ingredients:
1/2 cup butter, softened
1 cup packed light brown sugar
2 eggs, room temperature
1 teaspoon pure vanilla extract

Liquid ingredients:
1/2 cup whole milk, room temperature
1 Tablespoon instant coffee granules

Optional:
Cinnamon Glaze (combine 1 cup confectioner's sugar, 2 Tablespoons whole milk, 1/2 teaspoon ground cinnamon, a splash of vanilla extract and stir until smooth)
Buttercream Frosting
Cream Cheese Frosting

Preheat oven to 350 degrees Fahrenheit. Line a standard 12-cup muffin pan with parchment liners. Stir instant coffee into milk until dissolved and set aside (if the coffee clumps, just let it sit and stir again before you're ready to use).

Whisk dry ingredients together in a medium bowl. Cream butter and brown sugar together in a large bowl until fluffy; mix in eggs and vanilla until well combined. Blend in remaining ingredients, alternating between dry and liquid, starting and ending with dry ingredients and mix until smooth. Fill each liner about 2/3 full and bake for 20-22 minutes, or until a toothpick inserted in the center of one comes out clean. Let cool before serving or topping with the optional suggestions above!

Mochaccino Snack Cakes

Reduce flour to 1 1/4 cups, and add 1/4 cup unsweetened cocoa to dry ingredients. Proceed as above and enjoy!

Notes: These would be great to have on hand for house guests, unexpected visitors, or for keeping all to yourself—I promise I won't tell ;-) The plain cakes can be served with whipped cream or ice cream for an easy dessert. And if you happened to add, oh, 1/4 cup mini chocolate chips to either batter...

>o<

Monday, November 24, 2014

Go Nuts: The Union Square Cafe's Bar Nuts

I think almost every celebrity chef has their own version of the Union Square Cafe's bar nuts. In fact, I've been making my own adaptation of Ina Garten's version for many years, and they've always been quite a hit. But I realized it was finally time to take a step back and try the original recipe - no interpretations, no substitutions, just the real deal as printed in the Cafe's own cookbook:

bar nuts snack appetizer
Belly up.


The Union Square Cafe's Bar Nuts

Ingredients:
1 1/4 lbs. mixed, unsalted nuts (about 20 oz.)
1 Tablespoon butter, melted
2 Tablespoons fresh rosemary, coarsely chopped
2 teaspoons kosher salt
2 teaspoons dark brown sugar
1/2 teaspoon cayenne pepper

Preheat oven to 350 degrees Fahrenheit.

Spread nuts evenly on a baking sheet and toast in the oven until fragrant, about 10 minutes. Combine the remaining ingredients in a large bowl, then add the nuts as soon as they come out of the oven and toss to coat. Serve warm and enjoy!

Notes: I think I would have liked a little more butter and rosemary, and maybe a bit less salt. However, I'll have to reserve judgement until I visit the Cafe and try these straight from the source :-) You can certainly use a single type of nut instead of a mix—pecans and cashews work extremely well with the other flavors here.

>o<

Friday, November 21, 2014

Spice It Up: Three Herb and Spice Mixes for Giving

I love making homemade or handmade gifts for friends and family, especially during the holidays. It's even better if the gifts are useful in some way—and what could be more useful than food? Here are three herb/spice mixes that just need to be stirred together and spooned into jars. Attach a label to each, and they're ready to go :-)

homemade spice herb mix gifts
A little something for you!


Scarborough Fair Herb Mix: Combine equal parts dried parsley, sage, rosemary and (you guessed it) thyme. Particularly good with poultry, fish, and root vegetables.

Game Night Spice Mix: Combine equal parts ground ginger, allspice, cinnamon and black pepper. Use to season dark meats like duck, bison, and venison. Add a few pinches to creamy sauces, soups and stews, dark leafy greens, or custard-based dishes like quiches and baked omelets.

Chai Spice Mix: Combine two parts ground ginger, one part ground cinnamon, a half part ground cardamom and a quarter part ground cloves. Add a teaspoon or so to the dry ingredients of baked goods like muffins, cakes, and cookies, or sprinkle on Greek yogurt with a drizzle of honey.

Notes: Any (or all) of these would work particularly well as a host/hostess gift, stocking-stuffer, or included in a basket of goodies for your favorite foodie. I like to use (or reuse) 3-4 oz. jars with tight-fitting lids, and include ideas for how to use the mix right on the label. Even though these are a lot of fun to give away, be sure to save some for yourself as well!

>o<

Monday, November 17, 2014

Cute as a Button: Cheddar Buttons

For years, I made a recipe for Peabody Cheddar Wafers I found in the November, 2000 issue of Yankee Magazine. The process involved cutting the butter into the flour mixture, resulting in crackers that tasted like cheesy pie crust—and there was nothing wrong with that! But lately, I was looking for something a bit different, and started to research recipes for Cheddar Pennies. The basic ingredients were identical in all the recipes I found, with the option to add extras like cayenne pepper, paprika, dry mustard or even fresh herbs. The method used to make them is similar to that of making cookies, and the result is a smooth dough with great cheese flavor. Needless to say, this mouse is hooked—and since mine are quite a bit larger than pennies, I had to choose a more suitable name for them ;-)

cheddar button crackers snack appetizer
No sewing required.


Cheddar Buttons

Ingredients:
1/2 cup butter, softened
1/2 lb. (8 oz.) extra sharp cheddar, finely grated
1 cup all-purpose flour
1/4 teaspoon ground paprika

Preheat oven to 350 degrees Fahrenheit.

In a large bowl, cream butter and paprika together until smooth, then blend in cheese. Mix in flour until fully combined and a smooth dough forms (you may need to use your hands toward the end). Separate the dough into halves, then halves again, etc., until you have 32 pieces of dough. Roll each piece into a ball, then flatten between your hands until the buttons are about a 1/4 inch thick. Place buttons on a lined baking sheet as you go, then prick each button twice in an "X" pattern using a fork. Bake for about 15-17 minutes, or until the edges are crisp and golden.

Notes: This is a great little nibble for cocktails, or to go with soups and stews (or even by themselves when no one is looking). I was impatient and put my buttons in the oven right away, but you can chill them in the fridge first for about 15 minutes to obtain cleaner edges and a flakier texture. The dough can also be patted into a disc, wrapped, chilled, then rolled and cut into shapes. Alternately, roll dough into logs, wrap, chill, and slice before baking.

>o<

Friday, November 14, 2014

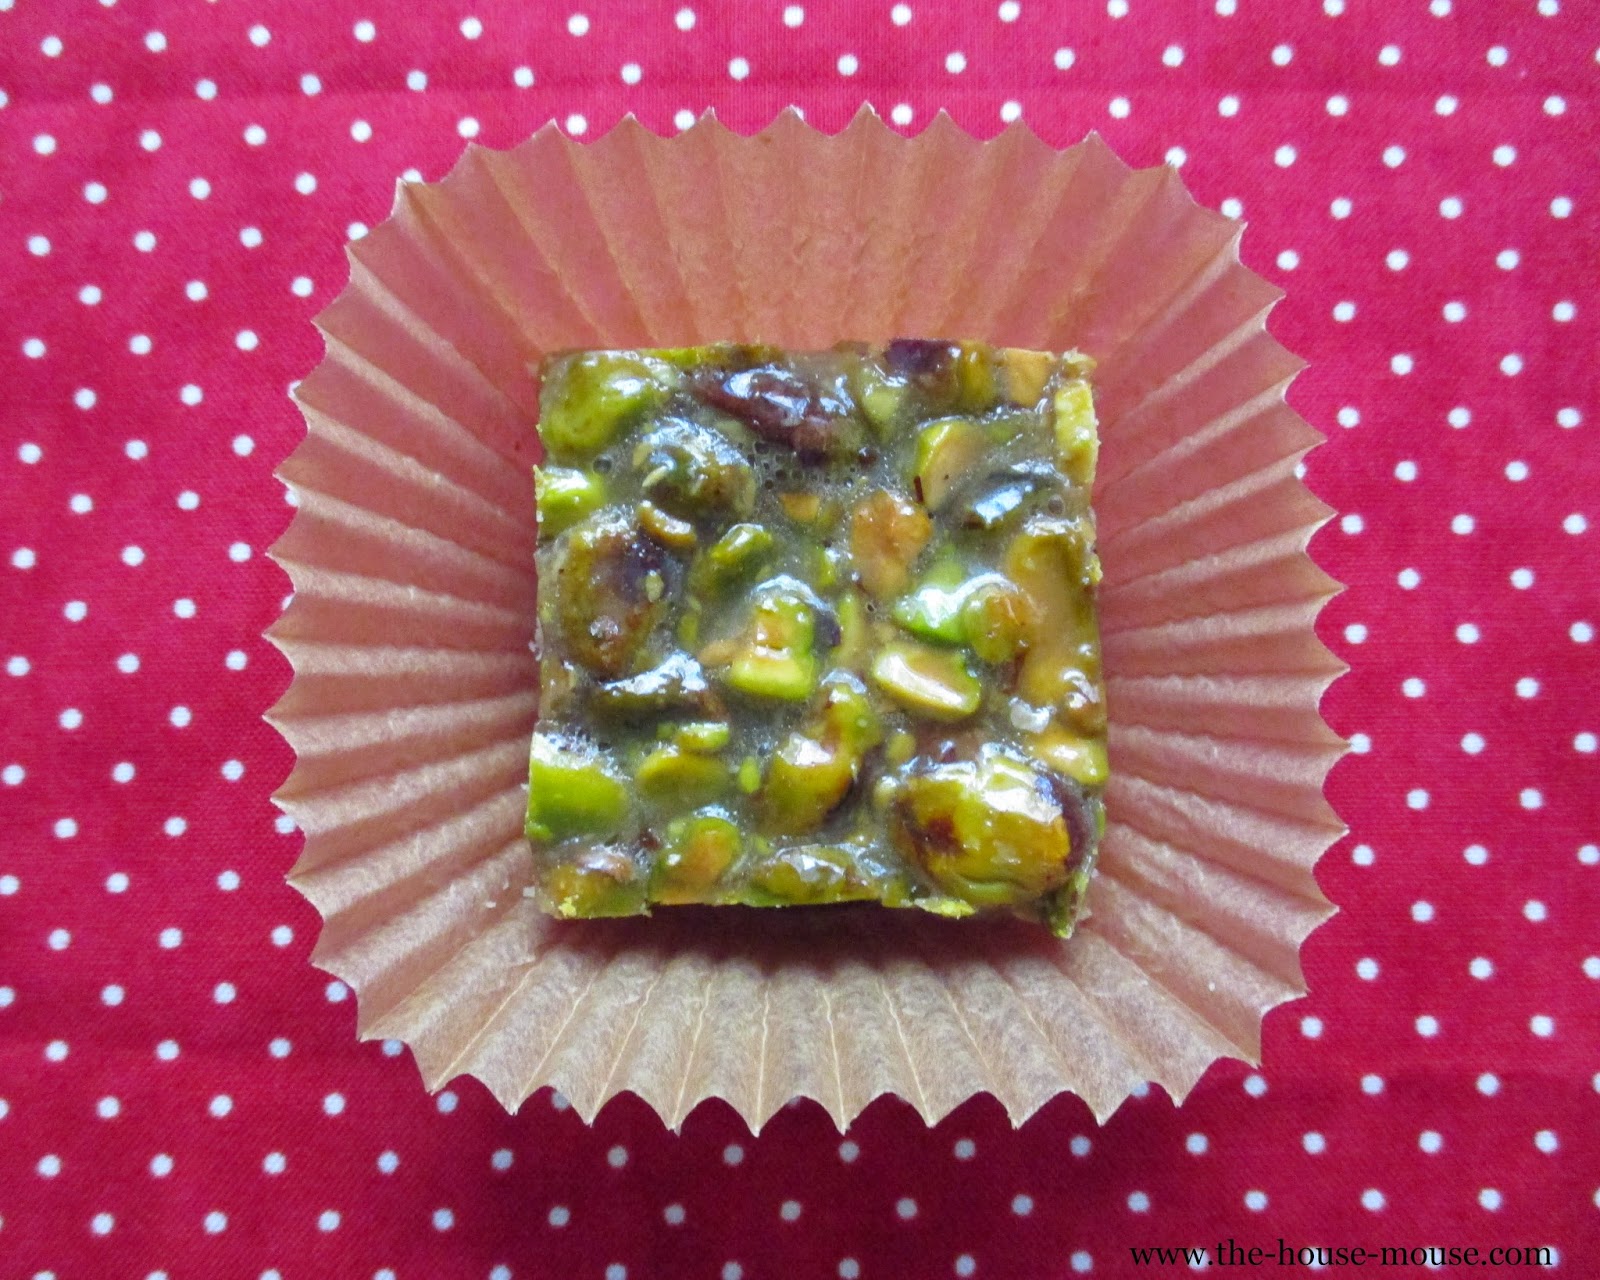
Raising the Bar: Salty-Sweet Pistachio Bar Recipe

I recently saw Martha make these pecan bars on TV, and they looked absolutely wonderful. I like pecans, and many other types of nuts, too. But above all others, I love pistachios, and immediately thought of trying them in this recipe. What intrigued me the most was the use of honey to make the ooey-gooey part of this bar, and I knew the pistachios would complement it perfectly:

pistachio bar cookies


Pistachio Bars

For the crust:
1/2 cup butter, softened
1/4 cup packed light brown sugar
1/2 teaspoon ground cardamom
1/2 teaspoon pure vanilla extract
1 cup all-purpose flour

For the filling:
1/4 cup butter
1/4 cup packed light brown sugar
1/4 cup honey
1 cup shelled, roasted and salted pistachios, roughly chopped
1/2 teaspoon pure vanilla extract

Thoroughly butter an 8-inch square pan; set aside.

In a large bowl, cream butter and sugar together until light and fluffy. Mix in cardamom and vanilla. Add flour and mix until combined—the dough will be crumbly. Press evenly into prepared pan and prick all over with a fork. Chill in the fridge until firm, about 15 minutes, while preheating the oven to 375 degrees Fahrenheit. Bake the crust for about 15 minutes, or until lightly golden. Move the pan to a wire rack and let cool completely.

Once crust has cooled, preheat oven to 325 degrees Fahrenheit.

Place butter, brown sugar and honey for the filling in a saucepan and melt over medium heat. Let mixture come to a boil and continue to boil, stirring constantly, for one minute—the mixture will thicken enough to coat the back of a spoon. Remove from heat and carefully stir in pistachios and vanilla extract. Quickly pour filling over cooled crust, spreading it out to the edges, and bake 15-20 minutes, or until the filling is bubbly. Let cool completely and cut into small squares or bars.

Notes: This recipe has been adapted from the original noted above. If you don't like cardamom, you can leave it out or replace with cinnamon. This is a salty-sweet treat, but unsalted pistachios would be equally delicious—just add a pinch of salt to the filling for balance. Cashews would work well in this recipe, too. For additional flair, drizzle melted white, milk or dark chocolate over the bars and let set before serving.

>o<

Monday, November 10, 2014

Shrubs: Not Just For Planting

Admittedly, I only first heard of shrubs a few months ago, even though they've been around for several centuries. Shrubs, or drinking vinegars, were common in colonial times, and have become popular again with modern mixologists and home drinkologists alike. The idea was enormously pleasing to me as well, as shrubs are a unique way to preserve and enhance the flavors of fresh fruit very easily at home.

homemade shrubs drinking vinegars
All assembled.

Using the "cold" method outlined here, I set out to create three different shrubs, steeping the fruits and flavorings in vinegar prior to straining and sweetening:

Shaken, not stirred.

1. Orange-Rosemary  Shrub made with champagne vinegar and sweetened with honey.
2. Cranberry-Ginger Shrub made with apple cider vinegar and sweetened with white sugar.
3. Apple-Spice Shrub made with apple cider vinegar and sweetened with light brown sugar.

The final results.

Once they were ready, I was able to move forward with the fun part - the drinks!

1. Tisane - just a teaspoon or two of the Orange-Rosemary Shrub made a tangy tisane. Additional honey would make this the perfect beverage to soothe a sore throat.

Not your usual cuppa.

2. Spritzer - a few spoonfuls of the Cranberry-Ginger Shrub topped off with lime seltzer made a refreshing and festive-looking spritzer.

Pretty in pink.

3. Highball - the warmth of the Apple-Spice Shrub was the perfect addition to the usual rye and ginger ale.

Bottom's up.

Shrubs have definitely added a kick to my drinking routine, all with very little effort from me. I'm already thinking about what kind to make next... Vanilla-Pear Shrub, anyone?

Notes: I'm a novice at this process, but a few quick web searches will provide you with information, instructions, and loads of fabulous shrub recipes. Shrubs can also be purchased online and at specialty food and drink stores. Experiment and enjoy!

>o<

Friday, November 07, 2014

Loaves and Switches: Chai-Orange Tea Loaf

The October issue of Food Network Magazine included an insert of 50 (FIFTY!) quick bread recipes, and it set my mind to racing. They offered savory variations in addition to sweet, much like my take on fruit cobbler. The flavor combinations were intoxicating, and I could hardly wait to start trying them.

Quick breads are standard repertoire for home bakers, and for good reason - quick, certainly, but also delicious and incredibly satisfying. And as I couldn't leave well enough alone, I tinkered and played with the recipes presented by FNM, adding a few extra touches along the way:

chai orange quick bread tea loaf
Have your tea loaf (and eat it, too).


Chai-Orange Tea Loaf

Tea infusion:
1/2 cup whole milk
One bag strong black tea

Dry ingredients:
1 1/2 cups all-purpose flour
1 teaspoon baking powder
1/2 teaspoon salt
1 teaspoon ground ginger
1/2 teaspoon ground cinnamon
1/2 teaspoon ground cardamom
Pinch of ground cloves

Wet ingredients:
1/2 cup butter, softened
1/2 cup sugar (vanilla sugar, if you have it)
1/4 cup honey
1 teaspoon vanilla extract
2 eggs
Zest of one orange

Glaze:
1/2 cup confectioner's sugar
1 Tablespoon whole milk
Splash of vanilla extract

Measure out milk and add teabag; let steep until needed.

Butter and flour a 9x5 inch loaf pan; set aside.

Preheat oven to 350 degrees Fahrenheit. Whisk dry ingredients together in a small bowl. In a large bowl, cream butter and sugar together until fluffy, then mix in honey, eggs, vanilla and orange zest. Beat in half of the dry ingredients, stir in the milk/tea infusion, then add the remainder of the dry ingredients and blend until smooth. Pour into prepared pan and bake about 40 minutes, or until a toothpick inserted in the center of the loaf comes out clean. Let cool in the pan for 20-30 minutes, then turn out and cool completely on a wire rack. Stir glaze ingredients together until smooth and drizzle over the loaf.

Alternate glaze: Combine juice from the zested orange and 1/4 cup granulated sugar until sugar has dissolved. Spoon over top of loaf as soon as it comes out of the oven. Continue to cool as above.

>o<

Monday, November 03, 2014

Perennial Harvest: Felt and Fabric Decorations for Fall

Despite the fact that, technically, I don't know how to sew, I'm fascinated by the colors and patterns of thread and fabric. Just looking at them is a pleasure in itself. However, with a little hand stitching, these lovely fall colors make for a more permanent collection of decorative gourds (and maybe a critter or two):

felt fabric handmade decorations Thanksgiving
The usual suspects.

Felt and Fabric Decorations

Materials:
Colored craft felt
Solid or patterned fabrics (remnants/fat quarters)
Embroidery flosses or No. 5 mercerized cotton threads
Doll needles
Straight pins
Poly-fil/stuffing
Templates or cookie cutters in desired shapes
Ballpoint pen
Sharp scissors (regular or pinked)
Embellishments (buttons, beads, etc.)

Trace template on backside of fabric; turn template over and trace again on a coordinating piece of felt. Cut out and match insides together, smoothing and securing with straight pins. Leaving a small border, stitch along the outside edge, leaving an opening at a larger end. Remove pins and stuff gently until pleasantly plump, but not so full that you can't close the opening. Finish stitching to close and tie off thread (hide the "tail" between the two layers, if possible).

Notes: Doll needles work well here, as the point is much sharper and the needle much longer than a regular embroidery needle. When using floss, I use all six strands together so the stitching stands out nicely. For the owl above, appliques and embellishments were added to the front side prior to attaching it to the back. Colors and fabrics can be chosen according to the season, making it easy to be creative any time of year!

>o<